It’s time to start cutting and shaping your croissants. Your dough has come together perfectly and you’re on your way towards making a batch of croissants like the world has never seen. Now this is the fun part! In addition to the instructions from my Croissant Recipe, here are my big takeaways to help you stay on track and bake the perfect final product.
1. I’ve said it before and I’ll say it again – the dough should be cold! You also want to make sure it’s not sticky, it should be dry to the touch and easy to work with. You need to make sure you’re working swiftly so the butter doesn’t have time to warm. No need to rush or stress, though – just keep moving.
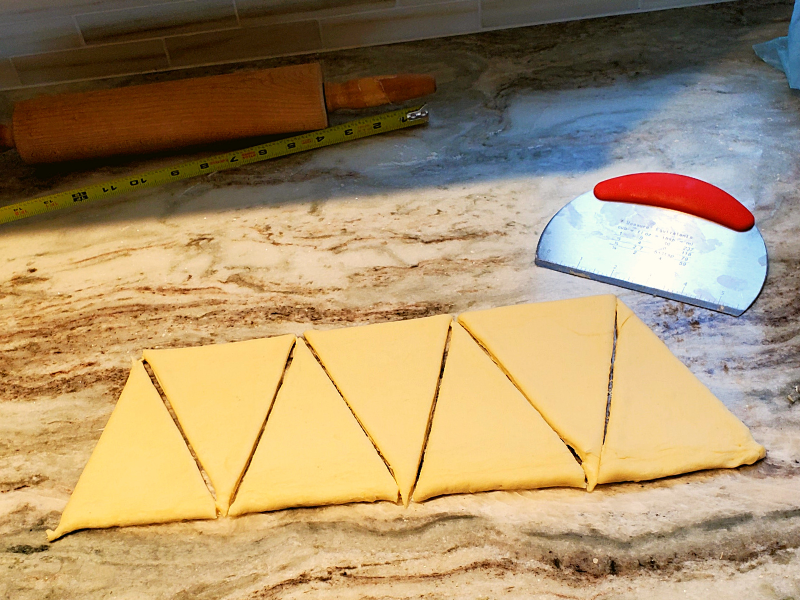
2. Be sure to use a measuring tape and definitely follow your markings. Things will go more smoothly when you’ve got tools to help keep you stay on track. BUT! Don’t fret about the milimeters when measuring your triangles. I definitely wasted time trying to get each croissant to be super precise. In the end, no one is going to hold a measuring tape up before biting into the flaky layers. You’re going to be stretching and working the dough a bit too so the key is consistency, not neurosis.
3. Once you’ve got your triangles cut, you want to stretch the bottom corners a bit and make sure they hold BEFORE you start rolling. Cut a small notch in the center of the bottom edge (about ¼ inch deep). This helps to spread the bottom of the triangle and give your croissants a bigger better shape. The dough wants to spring back (which is good!) so take an extra few seconds to help the dough settle into its stretch-y shape make sure the gluten doesn’t shrink the whole thing back to a perfect isosceles triangle before you roll.
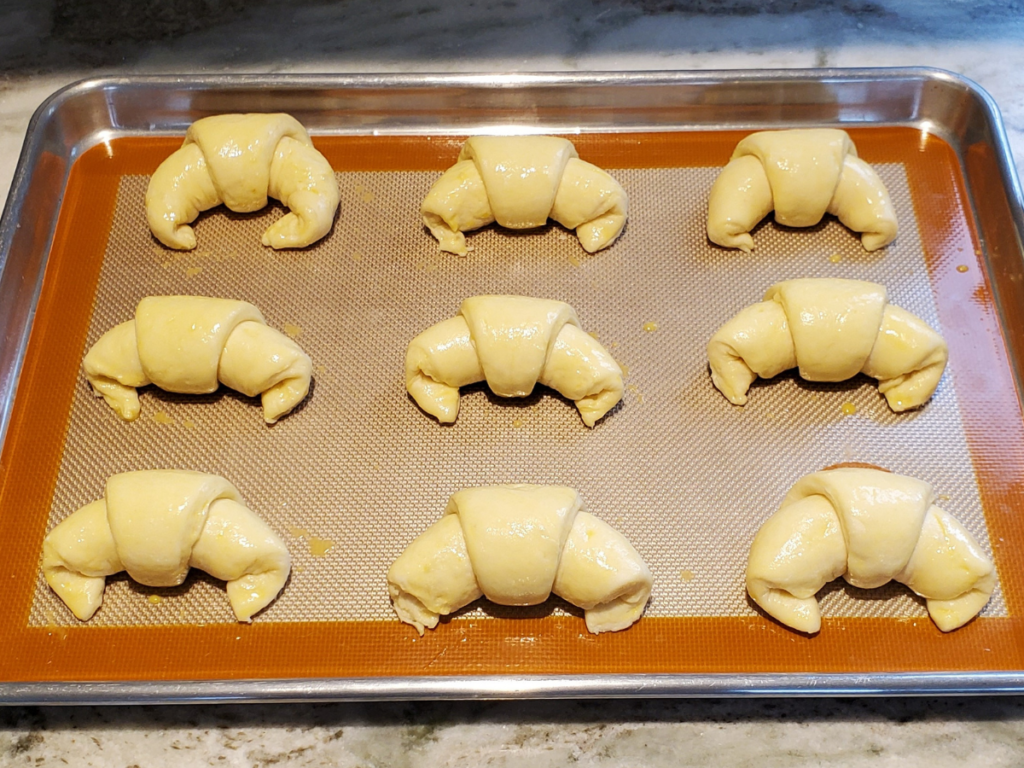
4. Rolling the crescent shape:
Roll smoothly without applying too much pressure – delicate is the key word here.
Pull the bottom corners gently outwards as you roll.
Make sure you end with the seam of the point underneath and in back of your croissant.
5. Rest the rolled croissants for about an hour on the countertop. You want to keep them covered (plastic wrap or a clean cloth is perfect) but any room-temperature space works. Taking the dough from the cold of the fridge to the warmth of the kitchen will make the dough start to rise. This is called proofing (where yeast ferments in the dough and releases gases that cause the dough to rise) and in about an hour’s time they’ll have nearly doubled in size!
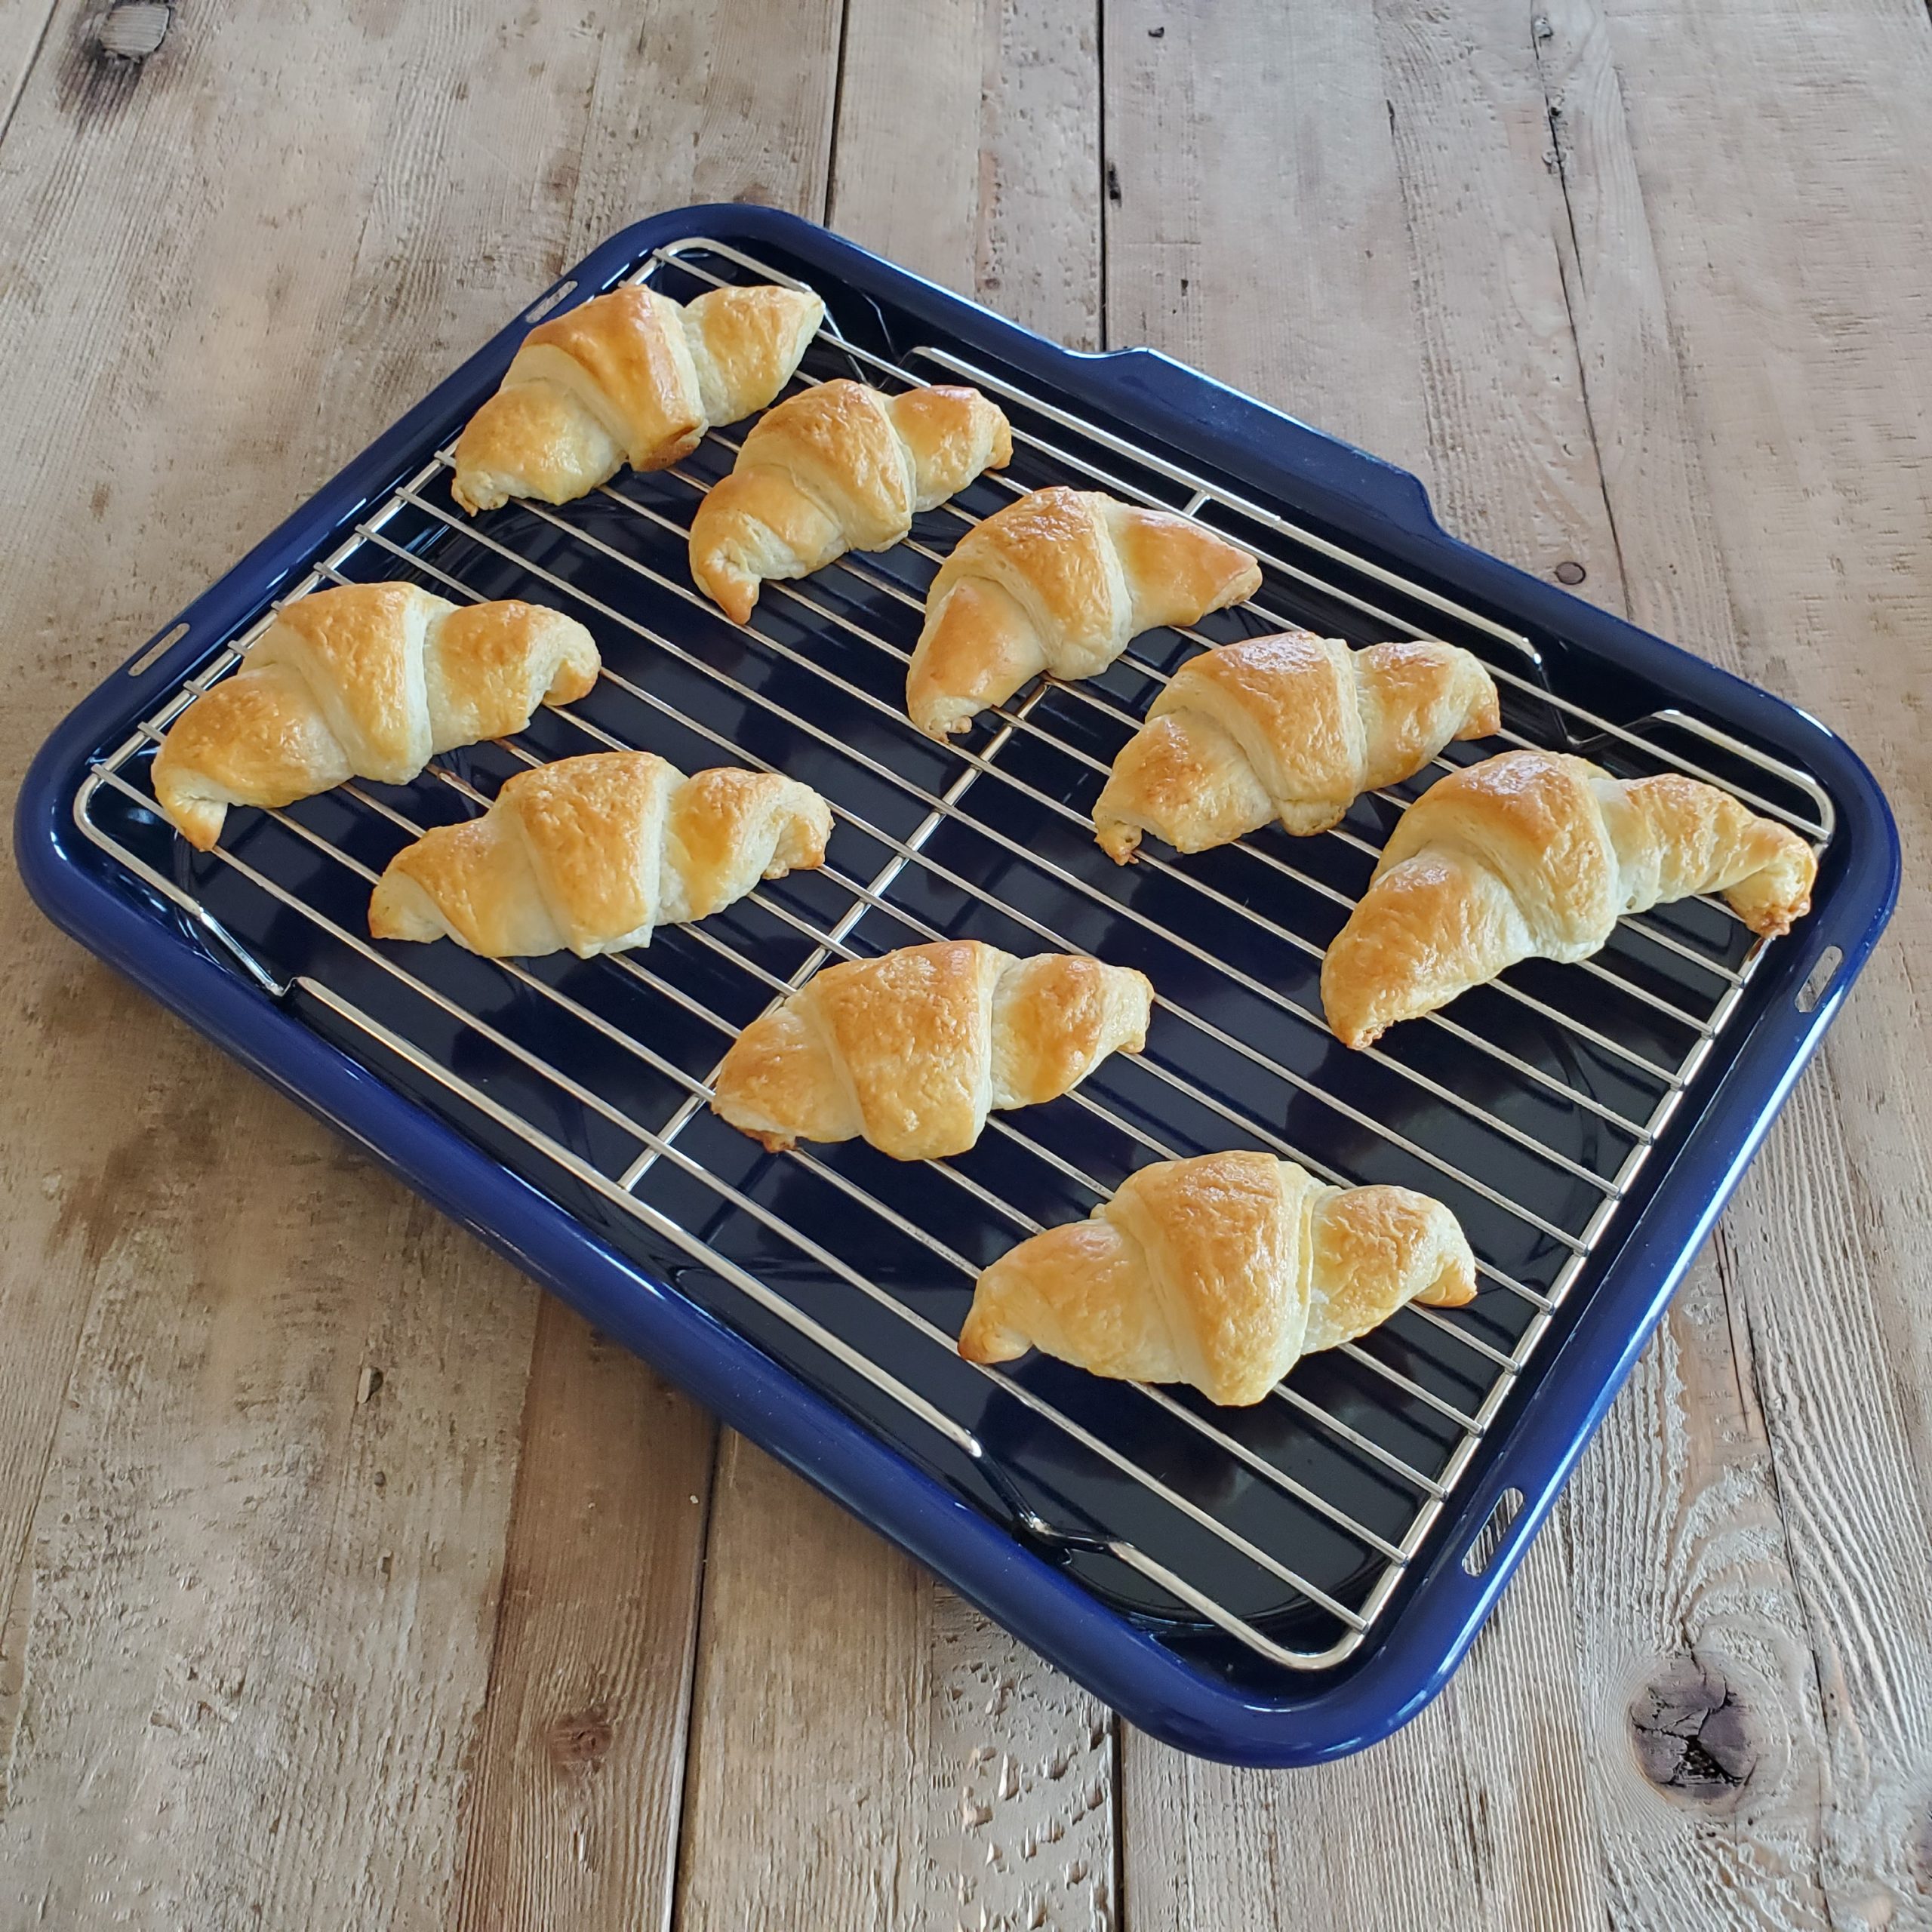
6. Last trick to baking the perfect croissant is to add your egg wash before hitting the oven. I did one batch with a very thin (but fastidious) coat and one with a more heavy hand, and personally I prefer the lighter coat – but to each their own. The light coat produced a pale color with less shine. But I found it made the croissants a bit softer. With a heavier hand in the egg wash the croissants were bright and shiny and the exterior had a darker color that really crunched when I bit into it. So, soft and light or crunchy and bright? Up to you!
Once you’ve perfected your prep the only thing left to do is bake! Let me know how your croissants turned out in the comments below, Plus, if you’ve got any tips or tricks you think should be added to the list above then I definitely want to hear them.